Page 5 of 7

Setting up iPhone SDK on a Virtual Machine

Disclaimer: All the information posted is intended for illustrative and educational purposes only. I just want to show you that it’s possible to set up the iPhone SDK on a Virtual Machine. Please, BUY an Apple Mac OS X License if you are going to use this and BUY a Mac computer (Apple’s EULA agreement states that you cannot run Mac OS X under non Apple hardware).

In this post I will try to explain how to set up the SDK for iPhone OS 3.1 on a PC running Windows (Vista 64 in my case). From the readme file of the SDK you can read:

Xcode 3.1.4, when used for Mac-only development, is compatible with Intel and PowerPC Macs running Mac OS X Leopard 10.5 and later. Use of the iPhone SDK requires an Intel-based Mac running Mac OS X Leopard version 10.5.7 or later.

So we need a Leopard 10.5. By googling a little bit you will realize that there are some modified ready-to-use Leopard images out there that you can download and run out of the box on VMWare.

I’m running a 10.5.2 version (which takes about 5 mins to boot on my quad core). Once you get a Mac OS X running on your PC, you can download the free iPhone SDK from developer.apple.com and install it.

Mac OS X Leopard on VmWare under Vista

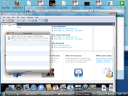
The iPhone SDK for OS 3.1 won’t install under a version prior to 10.5.7 so I had to ‘trick’ the installer rather to update the Mac OS X which seems to be a painful process. To do this, you have to modify the /System/Library/Core Services/SystemVersion.plist and change both the ProductUserVisibleVersion and ProductVersion keys to 10.5.7.

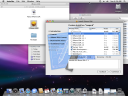
With this done, I selected just the SDK for 3.1 (to save space in my hard disk) and the installation process begins.

Custom Install  And 3.5 hours later….  Install Succeeded

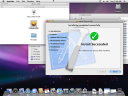
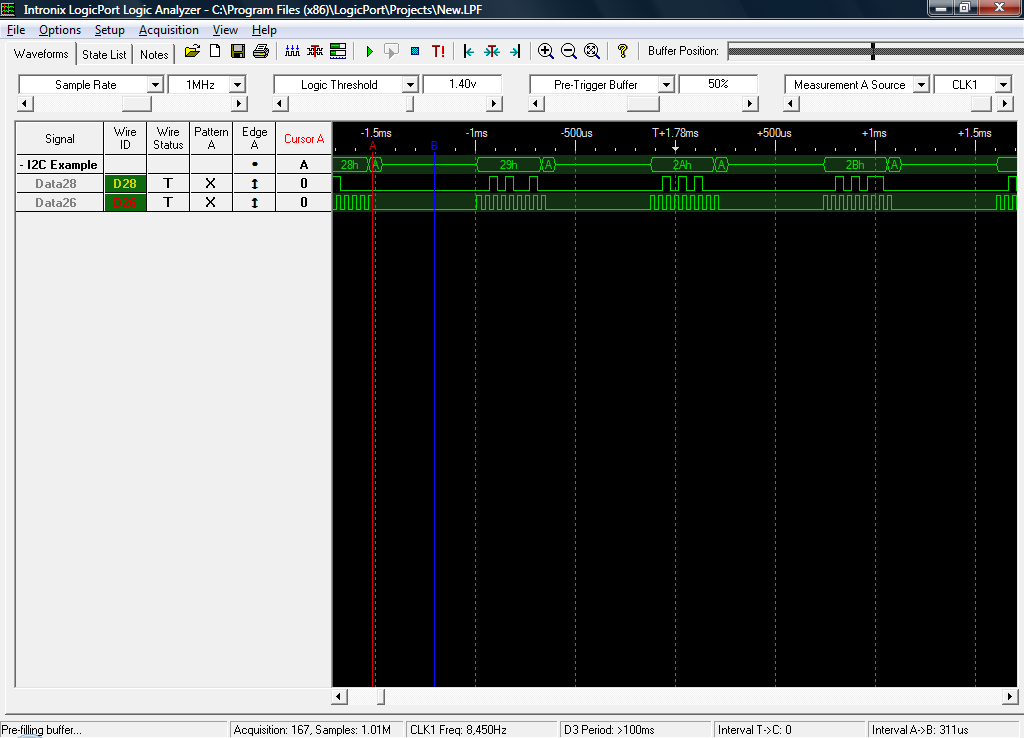
Once you have the iPhone SDK installed, you can run Xcode (from SpotLight) and launch a new project using a template just to try it out on the iPhone Simulator:

Xcode and simulator   Xcode and simulator (2)

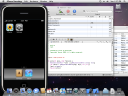
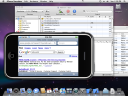
At this point you can develop your own iPhone applications and test them on the simulator. Also, if you joined the Apple developer program (the standard one is $99) you can test them in your iPhone as well.

If you’re planning to play around with the SDK I strongly recommend you to sign up on the iPhone Dev Center because there are lots of resources available: Getting started documents, videos,  sample code, etc.

More to come,

Daniel

Playing with inertial sensors and Kalman Filter

I’ve started to build some sort of two-wheel Balancing Robot and before getting the party started I’m having to deal with mixing up the data gathered from my inertal sensors.

My homebrew IMU (Inertial Measurement Unit) is composed by one 3-axis accelerometer and 1-axis gyroscope. The gyro sensor’s got an analog output (.67mV per degree/s) and the accelerometer’s got an i2c interface. I would love to share its part number with you but, since I liked this unit to be as cheap as possible, the sensors were ripped out (and reverse-engineered with a logic analyzer) from a cheap PS3 gamepad bought on eBay ;).

Since the output of the gyro sensor is ‘too low’ for my ADC, I built a simple non-inverter amplifier and a low pass filter with a cutoff frequency of 1KHz. Also I placed a high pass filter (cutoff frequency at .3Hz) in order to compensate the temperature drift. The data from the accelerometer’s digitally filtered on the microcontroller with a simple 1st order Butterworth filter.

Inverted Pendulum

The main idea of this kind of robots (inverted pendulum) is to measure the tilt angle in order to drive the wheels just below the mass. The higher the center of gravity, the easier balancing will be. Why do we need both an accelerometer and a gyro?

– The acclerometer senses not only the gravity (tilt) but the acceleration forces on its axis. So it would be useful if it was static (no acceleration due to movement).

– The gyro outputs angular velocity (degrees per second) and it’s not sensitive to acceleration. In order to get the angular position we have to integrate this signal. However this will drift over the time and the estimated tilt angle wouldn’t be accurate after some seconds.

The ‘trick’ is to take out the best of each sensor: the long-term information from the accelerometer and the short-term response from the gyro sensor. One way to do this is using a ‘black-box’ known as Kalman Filter (if you are brave enough, have a look at the theory; I’m not :)) which mixes up both signals predicting the actual tilt angle.

I got some source code of this filter from rotomotion (http://scratchpad.wikia.com/wiki/RotomotionCode) and pushed it directly onto my microcontroller. The sensors are sampled at 50Hz and fed to the KF at the same rate. In the next plot you can see the raw tilt angle (atan2(raw_accy, raw_accx)), the integral of the gyro sensor (using the trapezoidal rule) and the output of the Kalman Filter.

Kalman Filter

As you can see, the raw tilt angle is a little bit noisy while the gyro integration is very clean. Also, there’s a lot of drift in this signal but magically the KF manages to estimate the angle very accuratelly and free of noise.

Now it’s time to try the filter with stronger movements and vibrations before feeding its output to the PID which will – hopefully – make the robot balance 🙂

I ‘ll post more on this soon!

Daniel

Creating library signatures for IDA

I’ll briefly explain how to generate the signature file for a given library in order to import it from IDA Pro and get the library functions identified by the disassembler (which can save you hours from digging into ‘well-known’ functions).

Requirements: FLAIR tools installed.

Execute the COFF parser

> pcf ms32.lib miracl

ms32.lib: skipped 0, total 432

>sigmake miracl miracl

You might get collision errors here:

See the documentation to learn how to resolve collisitions.
: modules/leaves: 9021136/432, COLLISIONS: 382

At this point, just edit the .exc file, remove the comments in the first lines and re-execute the sigmake command.

Now you’ll see a miracl.sig ready to be imported from the FLIRT signatures window in IDA Pro.

Daniel Álvarez

Windows Mobile – Routing audio through the Earpiece (PPC / SmartPhone)

Hello,

I’ve developed a little application that switches the audio output from the rear speaker to the front one and viceversa. This is useful for VoIP applications which are quite unusable without headphones since the audio comes from the back speaker. It just runs for 10 minutes and it’s supposed to work at least with the latest HTC models.

Download PocketPC Trial version:

PPC-AudioSwitch.zip

Download SmartPhone Trial version:

SmartPhone-AudioSwitch.zip

Don’t hesitate to contact me for any further information.

Daniel

I2C Protocol – Clock Stretching

I’m working on a project which involves an i2c communication between a master and some slaves. The master device is using an LPC2148 microcontroller running at 60 MHz and the slave ones have a low-cost PIC microcontroller. Each slave device runs a different task and some of them are more CPU-intensive than others.

The nature of this i2c communication is essentially some kind of Query-Response protocol in which the master requests some processing from the slaves and they send back the results to the master. The processing time varies from one slave to another and sometimes it will be higher than the master ‘clock’ time.

This leaded me to find a way to stop the master until the slave is done with its processing: clock stretching. The slave will pull the clock line down, causing the master to stop until it’s done with its task and then releases the SCL line (going high due to the required pull-ups of the i2c signals).

As I was writing the slave C code using PICC compiler, there was no way to implement this technique directly from the supplied i2c functions therefore I’d got to implement it by myself:


#byte PIC_SSPCON=0x14
#bit CKP = PIC_SSPCON.4 // 1 = Release Clock, 0 = Holds Clock Low (clock stretch)
#define SCL_STRECTHING_ON bit_clear(PIC_SSPCON, 4); // CLK STRETCHING
#define SCL_STRETCHING_OFF bit_set(PIC_SSPCON, 4); // release clock to master


ISR:

if(state >= 0x80) //Master is requesting data
{
SCL_STRECTHING_ON
delay_us(400); // Simulate processing delay
i2c_write(buffer[cnt++]);
SCL_STRETCHING_OFF
}

Please, note that the values defined for SSPCON register / bits are for PIC16F677 microcontroller and it might differ from the one you’re using.

Below you can see an screenshot of the Logic Analyzer output I used for testing purposes. You can see the 400 us delay between two consecutive readings from the master while the SCL line remains low.

I2C Protocol - Clock Stretching

All in all, it’s a well known technique described in the protocol specification but as far as I’m concerned by googling a little bit, its usage is not very extended and there are not so much source code out there addressing this issue.

Daniel

LaTeX in WordPress

When I had to write some formulas in the blog I used to render them from LaTeX to images using some websites such as Online LaTeX Equation Editor. It has the disadvantage that you’ve got to write the equation, render it, save it to your harddisk and then upload to the WordPress file manager. Now, thanks to an interesting plugin written by Steve Mayer you can embed its usage into WordPress just by typing the LaTeX commands between special tags.

sum_{n=0}^{infty}frac{(-phi^2)^n}{(2n)!}

It uses MimeTeX  which is an standalone program that directly renders LaTeX expressions into images without using the entire TeX package or its fonts. Thus, it’s a simple, lightweight and elegant solution ready to be used in your websites or blogs.

D.

Campus Party 2008 – Robots Competitions


Golden Cup

Last week, we attended to Campus Party in Valencia. At CampusBot area, some robots competitions took place along the week and we had our line followers ready to fight. The results were pretty good: In the qualifying session on Tuesday we got the fastest two times with our two robots and in the finals on Saturday (being held at Ciudad de Las Artes y Las Ciencias) we managed to win the two first places in the podium !

 Here you can see some videos:

Slayer S8 during our first training rounds:

Slayer S8 from a speed view like if it was an F1 camera 🙂 running at more than 2,5m/s:

Slayer S8 at Semifinals Round against the later 4th classified:

It was a great week and the robots performed pretty well in such a speedy track. I might upload some more media when I finish collecting all the videos and pictures from the event.

My colleague Alberto Calvo and me are already thinking in our next robot which will have some kind of inertial control based on gyroscopes and accelerometers. I’ll keep the blog up to date.

Special thanks to our teammates and friends Luis-Ángel Gónzalez and Daniel de la Torre who drove more than 800 km by car just to watch the final rounds and support us (well and to have a nice Paella in front of the beach). Thanks guys!

More to come,
Daniel

H-Bridge MOSFET Board – RL-AMC-50NP04

RL-AMC-01

RL-AMC-50NP04 is an advanced Full H-Bridge board based on high performance MOSFETs capable of driving two high power DC motors. It has been designed to achieve a great efficiency and usage simplicity since just 3 pins are needed to control a motor. Based on the large experience working with Robotics we designed this board keeping in mind some important factors such as power dissipation, heating, simplicity and functionalities like braking, bi-directional control of the motors and a wide range of PWM frequencies from 3.3v or 5V microcontrollers.

Its small size makes this H-Bridge MOSFET board perfect to fit in your Robotics designs: 50 x 42 mm (1,97 x 1,65 inch) .

Main features:

  • 2 high power DC Motors control.
  • PWM frequencies up to 20 KHz for speed control.
  • Bi-directional control.
  • Braking function (coast and brake functions).
  • 3.3v / 5V logic capable.
  • Up to 8A continuous operation with very low internal resistance (0.038 ohms).
  • Up to 35A pulsed current.
  • Wide range of power supply voltage ranging from 3 to 40V.
  • Current sense (just 6mV per amp to minimize the total voltage drop when high currents are demanded).
  • Just 3 pins needed from your microcontroller to drive each motor.
  • Two LEDs per leg indicating the rotating direction of each motor.
  • Easy interface connections through an standard 10-pin male header.
  • Three two-pin terminal blocks for connecting the motors and their power supply.
  • Logic power supply ranging from 2V to 6V.

Here you can see the output of the board when driving one of its LEDs with a voltage supply of 8,4V. The voltage drop accross the LED is about 1 Volt and in this graphic you can appreciate that the rising and falling times are extremely small since it has been designed for operating in high-speed environments with the maximum efficiency. This minimizes the transition time of the MOSFETs (time when their internal Rds resistance is higher) and, thus, also minimizes the total power dissipation due to switching power losses.

RL-AMC Output 7.2KHz

If you are interested in this board or have any further questions / suggestions don’t hesitate  to contact me.

Documentation:

More to come,

Daniel

Debugging Windows Mobile 6 Applications with IDA

Today I’ve been trying to debug an application remotely with IDA Pro and I found the following error when launched the program:

Copying the debugger server to PocketPC ...
Could not invoke debugger server at PocketPC: Access denied.

Thus, surfing the web I found a workaround regarding the security polices of the handheld. Just by changing some values in the registry you will be able to copy/invoke the debugger remotely.

Key: 'HKLMSecurityPoliciesPolicies001001'  from  value DWORD:2 to value DWORD:1

Key: 'HKLMSecurityPoliciesPolicies00100b' change  to value DWORD:1

And now you’ll be able to debug your programs remotely 🙂

Cheers,

Daniel